

Mastering Your Outboard Lower Unit Oil Change
Changing your outboard's lower unit oil is arguably the single most important preventative maintenance task you can do. Far more than just a simple fluid swap, it's a crucial health check that can save you from a catastrophic gearcase failure—and a repair bill that runs into the thousands.
Think of it as a proactive strike, removing harmful moisture and metal shavings before they get a chance to do any real, irreversible damage.
Why This Isn’t Just Another Chore on the List
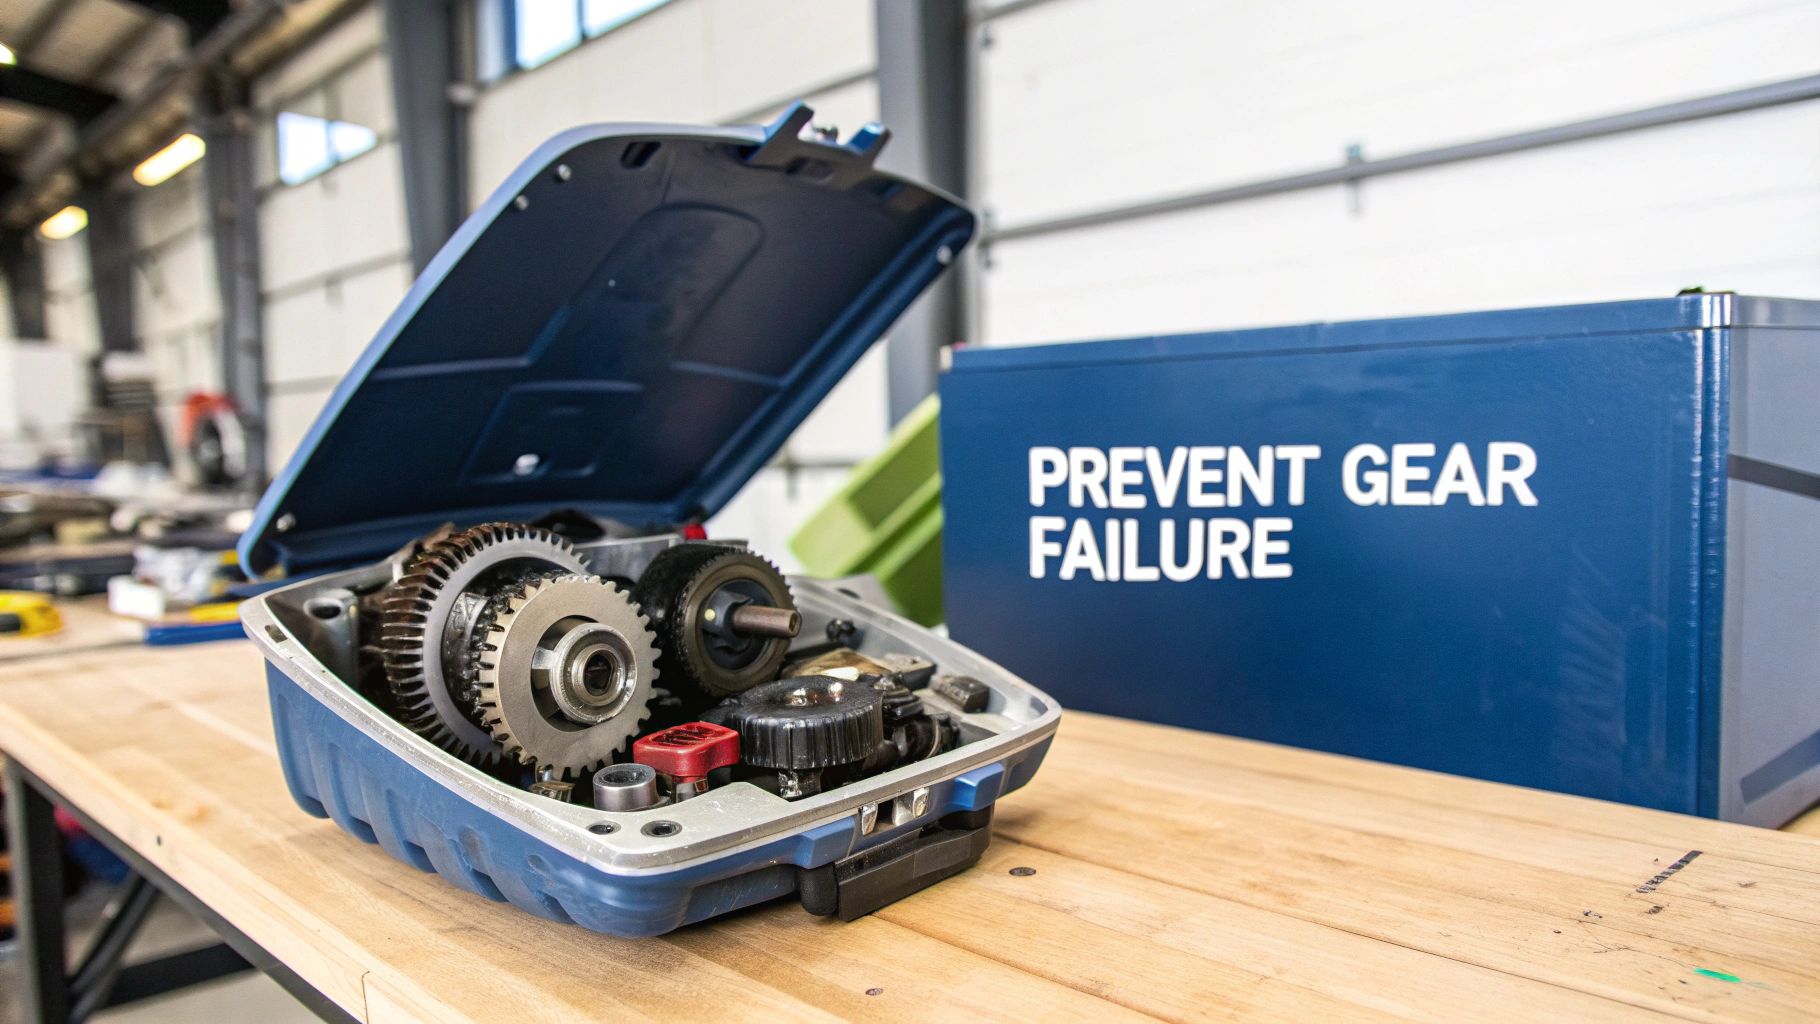
It's a common trap for boat owners to think, "If it's not leaking, it must be fine." This is a dangerously expensive assumption. Your lower unit, or gearcase, is essentially your outboard's underwater transmission. It’s operating in an incredibly harsh environment, constantly fighting against friction, high heat, and the ever-present threat of water getting in.
The gear oil inside is the only line of defense between smooth, quiet operation and a seized-up disaster. Over time, that lubricant inevitably breaks down and loses its ability to protect those precision-machined gears.
The Unseen Enemies Inside Your Gearcase
Your lower unit is a sealed system fighting a constant battle against microscopic but incredibly destructive invaders.
- Moisture Intrusion: Even a few drops of water can wreak havoc. It often sneaks past a worn-out prop shaft seal, turning your gear oil into a milky, useless sludge that quickly leads to rust and corrosion on vital bearings and gears.
- Heat Degradation: The intense friction from those spinning gears generates a ton of heat, which slowly "cooks" the oil. This thermal breakdown destroys its viscosity and protective qualities, leaving your components vulnerable.
- Metal Shavings: It’s perfectly normal for new gears to shed tiny metallic particles as they wear in. But if you let those particles circulate, they act like liquid sandpaper, dramatically accelerating wear on every single internal part.
Changing the oil isn't just about replacing old fluid with new. It’s a diagnostic tool. The condition of the old oil gives you a clear snapshot of your gearcase's health, letting you catch small problems before they become season-ending failures.
The Real Cost of Neglect
Skipping your annual lower unit service is a gamble where the odds are stacked against you. The numbers don't lie: neglecting this simple job can slash an outboard's lifespan by up to 40% and bloat your total ownership costs by 25%.
Worse yet, one study tracking thousands of engine issues found that neglected gear oil was the direct cause of 28% of all on-water tow requests, with an average callout cost hitting $450.
Performing this service annually is the best investment you can make in your outboard. It transforms a potential multi-thousand-dollar repair into a simple, under-an-hour job that requires just a few essential supplies.
Protecting your investment starts with using the right parts. For every OEM-spec item you need—from the correct marine gear lube to the essential drain plug seals for your specific model—MacombMarineParts.com has you covered. For a deeper dive into keeping your engine happy, check out our guide on essential marine engine maintenance.
Getting Your Gear Ready for a Flawless Job
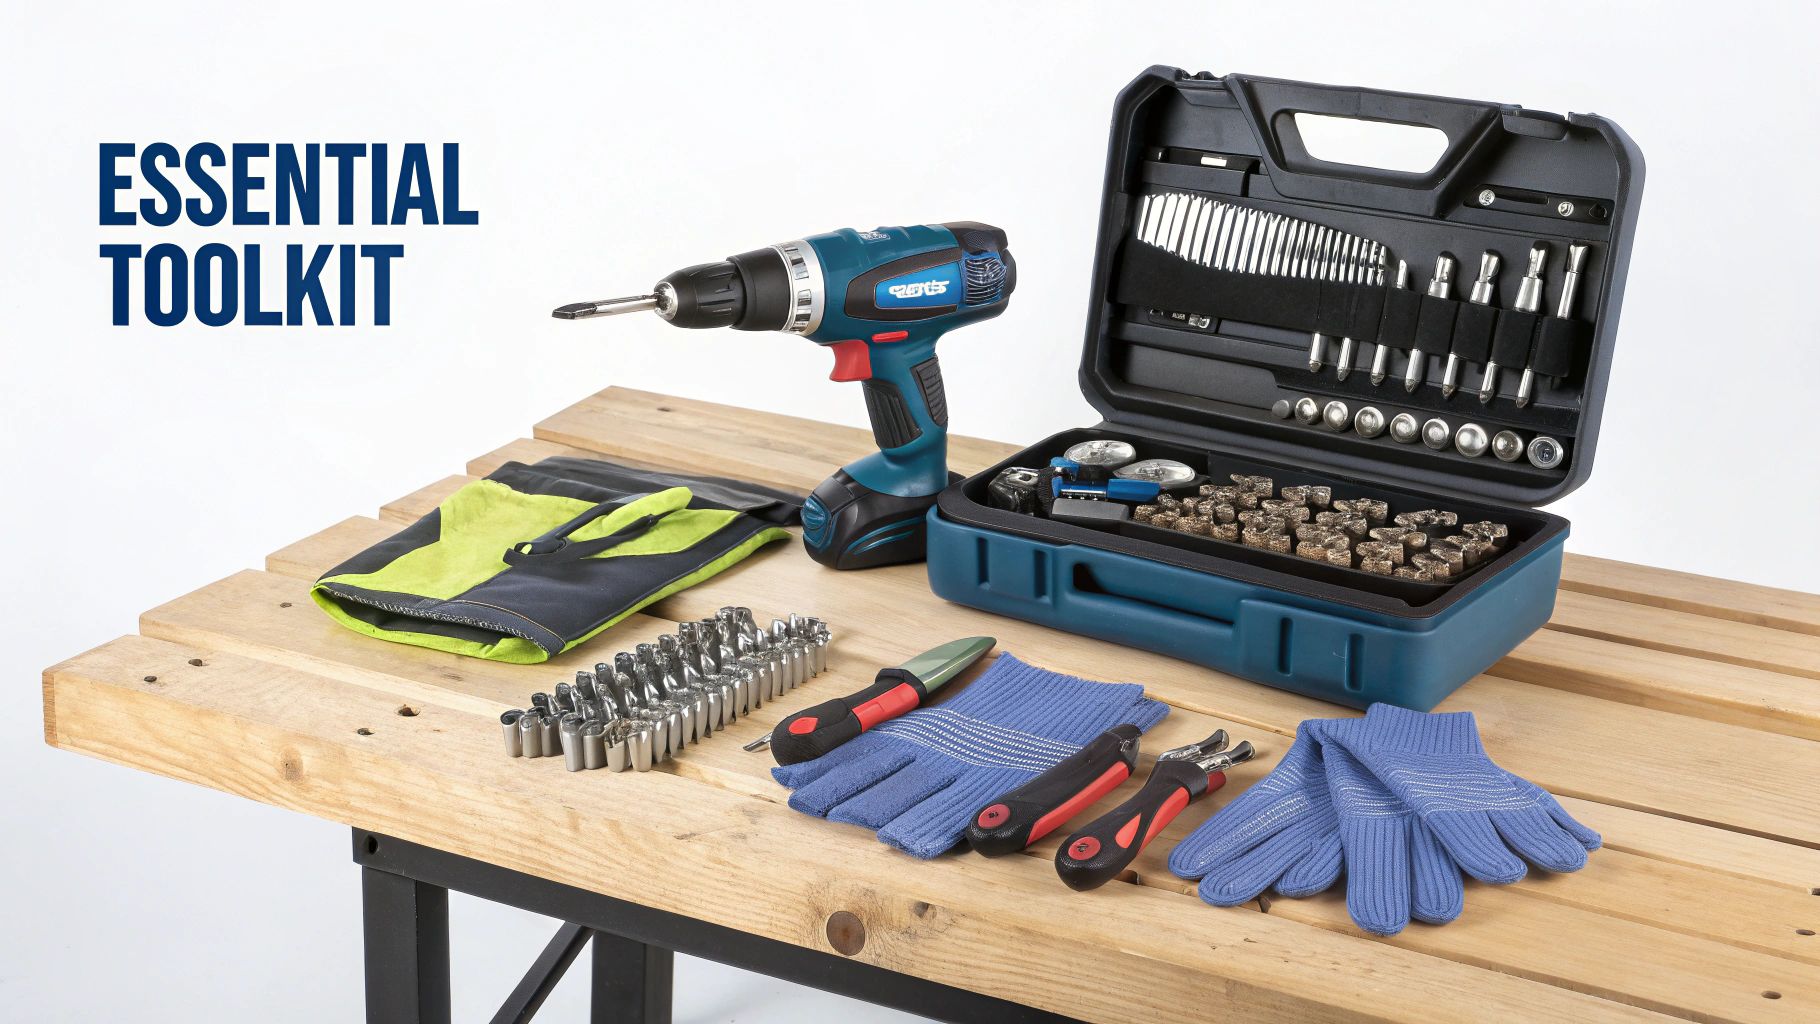
Before you even think about touching a drain plug, the most important part of this job is getting all your tools and supplies lined up. This isn't just about making things easier; it's about doing the job right to prevent stripped screws, leaks, and a whole lot of frustration.
Trust me, trying to do this with the wrong screwdriver or realizing you forgot to buy new gaskets is a classic recipe for disaster. A little prep work here turns a potentially messy job into a quick, professional service you can be proud of.
The Essential Toolkit Breakdown
Having the right equipment on hand is the difference between a frustrating afternoon and a smooth, ten-minute task. Every item on this list has a purpose, and trying to substitute them often leads to trouble. We always recommend purchasing your marine parts and supplies from MacombMarineParts.com to ensure you get the right fit and quality.
Here’s your must-have checklist:
- A Big Flathead Screwdriver: The drain and vent plugs on most outboards have wide, shallow slots. Using a screwdriver that's too small is the number one reason these plugs get mangled. You need one with a tip that fills the entire slot, giving you the leverage to apply firm, even pressure without slipping.
- Gear Lube Pump: This one is non-negotiable. A dedicated pump screws right onto the gear oil bottle and into the lower drain hole. It lets you fill the gearcase from the bottom up, which is the only way to push all the air out. Skipping this can lead to air pockets that starve your gears of lubrication.
- Drain Pan: Any simple oil drain pan will do. Just make sure it can hold at least two quarts to catch the old gear lube without making a mess.
- Shop Rags or Paper Towels: This job is messy. Have a good supply of rags ready to wipe down the lower unit, clean off the magnetic drain plug, and handle any drips.
Pro Tip: Before you drain anything, try to crack both the drain and vent plugs loose while the engine is trimmed down. This makes sure you can actually get them off before you're committed. There’s nothing worse than draining the gearcase only to find the fill plug is seized solid.
Choosing the Right Gear Lube and Gaskets
Picking the correct fluid and seals is just as important as using the right tools. I've seen too many lower units damaged by the wrong oil or leaky, reused gaskets.
Gear Lube: Your outboard needs a marine-specific gear lubricant with an API GL-5 rating. Don't just grab automotive gear oil; marine formulas have emulsifiers that help protect the gears even if a little water sneaks in.
- Conventional vs. Synthetic: For most weekend boaters, a quality conventional oil is perfectly fine. But if you have a high-performance engine or put it under heavy loads, a full synthetic offers better protection against heat and breakdown.
- Quality Brands: Stick with proven names. Brands like Quicksilver and Sierra are engineered to meet or beat manufacturer specs, giving you peace of mind that your gears are protected. You can find these top brands at MacombMarineParts.com.
Drain Plug Gaskets: These tiny washers are arguably the most critical part of the job. They are single-use crush washers designed to deform and create a perfect seal. Reusing them is the number one cause of slow leaks that let water in and oil out.
Always, always replace them. A new pair of gaskets is the cheapest insurance you can buy for your lower unit's health. You can find the exact lube and seal kit for your engine over at MacombMarineParts.com. And for more pointers, check out our guide on easy oil changes with a Johnson Pump.
Alright, with all your tools and supplies lined up, it's time to get your hands dirty. Changing the lower unit oil is a pretty straightforward job, but the sequence of steps is absolutely critical. Getting it right means you get every last drop of the old, gunky stuff out and refill the gearcase without trapping air. That’s the whole game—complete lubrication to protect those expensive gears.
The process is designed to work with gravity, not against it. We'll start by getting the engine in the right position, then walk through draining, inspecting what comes out, and refilling it the proper way. This is more than just an "oil out, oil in" task; it's a careful procedure that ensures your lower unit is ready for another season.
Getting the Old Gear Lube Out
First things first, trim your outboard so the lower unit is hanging perfectly vertical. This is key to getting a complete drain. Slide your drain pan right under the skeg to catch the mess.
Now, find the two drain plugs. You’ll see one at the very bottom of the gearcase and another one further up that acts as a vent. Here’s the single most important part of this step: always, always remove the bottom drain plug first. Grab your big flathead screwdriver, give it some firm pressure, and turn it counter-clockwise. A little bit of oil might weep out, which is perfectly normal.
With the bottom plug out, go ahead and remove the upper vent plug. The second you do, you'll hear a little whoosh as air rushes in, and the old oil will start flowing out of the bottom hole like a champ. Let it drain completely. This might take a few minutes, so don't rush it. Patience here pays off by getting as much of the old, contaminated fluid out as possible.
What the Magnetic Plug is Telling You
While that oil is draining, take a good look at the bottom drain plug. Most of them are magnetic for a good reason—they’re designed to catch any tiny metal particles floating around in the oil. What you find stuck to it is like a health report for your internal gears.
- This is Normal: A fine, dark gray paste or fuzz on the magnet is nothing to worry about. That’s just the result of normal gear break-in and wear.
- This is a Red Flag: If you see shiny, glittery flakes or, worse, actual metal chips, that's a sign of a bigger problem. It could mean excessive wear or even damage to a gear or bearing. If you find this, it might be time to have a professional take a look.
Wipe the magnetic plug clean with a shop rag. You also need to find the small, single-use gaskets on both plugs and toss them. Never, ever reuse these little guys; they are designed to be replaced with every oil change.
A clean magnetic plug is your baseline for the next service. The amount of "fuzz" you find is a valuable piece of data you can track over time to keep an eye on your gearcase's health.
Filling From the Bottom Up is a Must
Once the old oil has stopped dripping and your plugs are clean, it's time to refill. Thread your gear lube pump onto your new bottle of marine gear lube. You can't go wrong with a quality product like the Sierra Type C Gear Lube from MacombMarineParts.com; it's perfect for the job.
Now, screw the threaded fitting from your pump hose into the bottom drain hole. There's a critical reason we fill from the bottom: it pushes the fresh oil upward, forcing all the air out through the top vent hole. This simple technique prevents air pockets, which can starve the gears of oil and lead to catastrophic failure.
Start pumping the new lube into the gearcase with slow, steady strokes. Keep going until you see a clean, bubble-free stream of new oil coming out of the upper vent hole. That's your cue that the gearcase is 100% full.
The Final Seal
With the gearcase full, you're ready to button everything up. The sequence here is just as important as it was for draining. Install the top vent plug first. Put a new gasket on it, screw it in, and snug it down. This creates a vacuum that will hold the oil inside while you deal with the bottom plug.
Next, working quickly, unscrew the pump fitting from the bottom hole and immediately install the clean bottom drain plug, also with a fresh gasket. A little oil is going to spill out—don't panic, that's how you know it was truly full.
Finally, tighten both plugs. You want them snug, but don't go crazy. The goal is to compress the new gasket just enough to create a perfect seal. A good rule of thumb is to tighten firmly with your screwdriver until it seats, then give it a final quarter-turn. If you're using a torque wrench, check your service manual, but the spec is usually around 60-80 in-lbs. Over-tightening can crack the housing, and that's a very expensive mistake. For specific diagrams and part locators for your engine, you can always check MacombMarineParts.com.
Decoding What Your Old Gear Oil Reveals
That old gear oil you just drained is more than just waste fluid—it’s a liquid report card on the health of your lower unit. Learning to read what the oil is telling you is one of the most critical skills in DIY outboard maintenance. It's how you spot a small problem before it becomes a catastrophic, season-ending failure.
The two biggest red flags you'll run into are water and metal. Both are serious, but they tell very different stories about what’s happening inside that gearcase. A careful look at what comes out of the drain hole will tell you exactly what to do next.
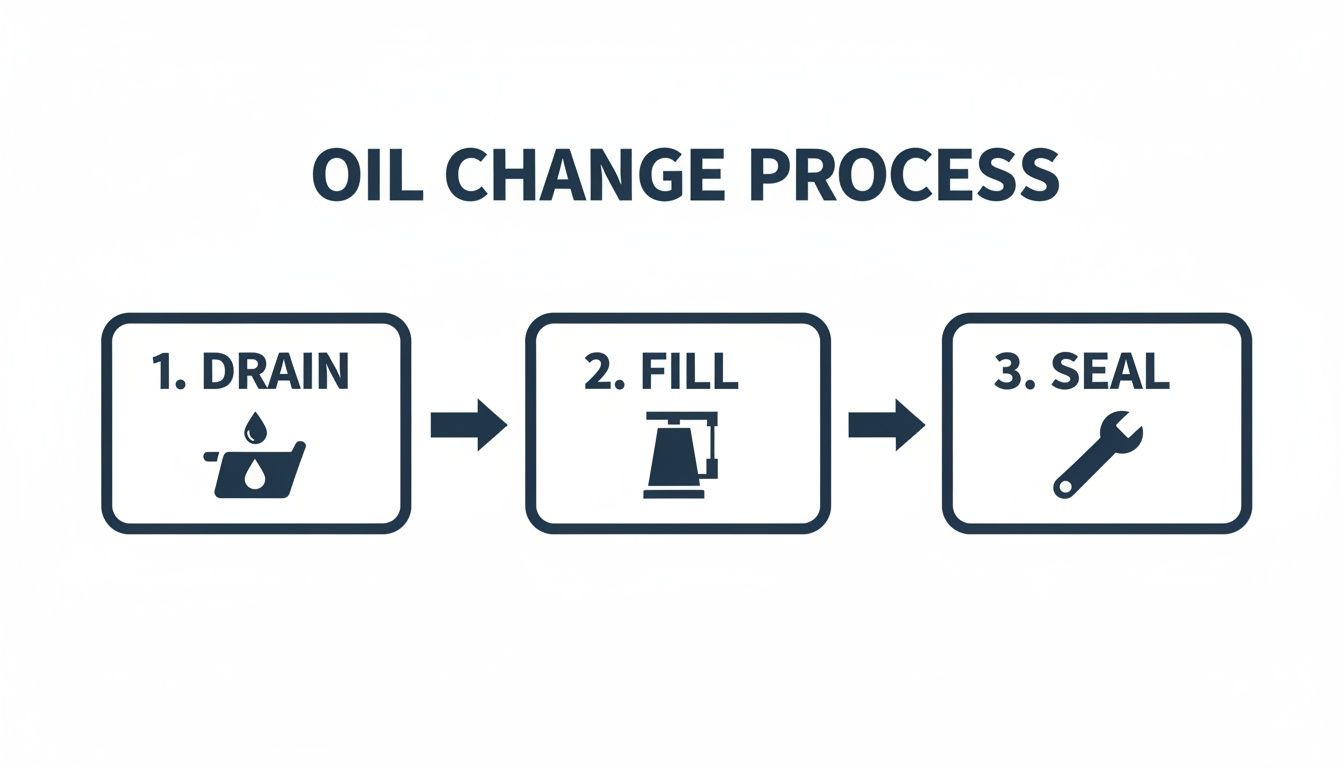
This quick visual is a great reminder of the process: drain it completely, fill from the bottom until it comes out the top, and seal it up tight.
What Your Drained Oil Can Tell You
When you pull that drain plug, what comes out tells a story. From milky messes to metallic glitter, each sign points to a specific issue inside your gearcase. Being able to spot these clues is the first step in a proper diagnosis.
Here's a quick rundown of what to look for and what it means.
Troubleshooting Common Gear Oil Issues
| Oil Appearance/Smell | Potential Problem | Recommended Action |
|---|---|---|
| Milky, Creamy, or "Coffee-Like" | Water intrusion from a failed seal (prop shaft, driveshaft, or shift shaft). | Stop immediately. Perform a pressure and vacuum test to locate the leak. Replace all necessary seals with parts from MacombMarineParts.com. |
| Glittery, Shiny Metal Flakes | Abnormal wear on gears or bearings. A gear tooth may have chipped or a bearing is failing. | Disassemble and inspect the gearcase. This is a serious sign of impending failure. |
| Dark Gray Paste (on magnetic plug) | Normal gear and clutch dog wear. | This is expected. Simply clean the plug and refill with fresh oil. |
| Black, Thick, and Smells Burnt | Severe overheating from overloading, wrong propeller pitch, or extreme-duty use. | Replace with a high-quality synthetic gear lube from MacombMarineParts.com. Evaluate boat setup and usage to reduce stress. |
Don't just refill the lower unit and hope for the best. Ignoring these warning signs is the fastest way to turn a simple seal replacement into a full gearcase rebuild.
The Tell-Tale Sign of Water: Milky Oil
If the oil draining out looks like a creamy coffee milkshake, you have a water problem. Period. This means a seal has failed somewhere, letting water invade the gearcase and mix with the lube. This emulsified gunk offers almost zero protection for your bearings and gears.
Running your motor with water in the lower unit is a huge mistake. The moisture will quickly rust and pit the precision-machined surfaces, leading to rapid, severe damage.
- The Usual Suspect: The prop shaft seals are the most common culprit. They get destroyed by tangled fishing line or simply wear out from use.
- Your Next Move: If you see milky oil, the gearcase needs a pressure and vacuum test. This will confirm there’s a leak and help you find exactly where it's coming from.
Do not just refill it with fresh oil. You have to fix the leak first. You can find OEM-spec seal kits for your exact model at MacombMarineParts.com.
Reading the Story on the Magnetic Plug
Like we said before, a fine, dark gray paste on the magnetic drain plug is just normal wear and tear. But if you see shiny metal shavings or what looks like glitter in the oil, that’s a different story entirely. This is a clear sign of accelerated, abnormal wear.
A collection of metal chunks or large flakes is a five-alarm fire. It strongly suggests a gear tooth has chipped off or a bearing is coming apart. Continuing to run the engine like this will almost certainly grenade the entire lower unit.
If you find anything more than that light, paste-like fuzz, it’s time to investigate further. Catching it early can sometimes prevent a total loss. For more help figuring out what's going on, you can explore our other diagnostic and troubleshooting articles for deeper insights.
What Burnt or Black Oil Means
What if the oil isn't milky or metallic, but it's just plain black and smells burnt? This is a sign of extreme heat. Your gearcase lube has been cooked. This thermal breakdown is often caused by running the engine too hard, having the boat overloaded, or using a prop with the wrong pitch that’s making the engine labor.
This condition means the oil’s protective properties have been destroyed. While it doesn't always signal an immediate mechanical failure, it's a serious warning that your lower unit is operating under far too much stress. Upgrading to a full-synthetic marine gear lube, available at MacombMarineParts.com, can offer much better protection against this kind of high-temperature abuse.
Pro Tips That Separate the Amateurs from the Pros
Getting the basic steps right is one thing, but a few smart habits are what really make the difference between a quick fix and long-term engine health. These aren't complicated tricks—just simple, proven practices that will save you from major headaches and costly repairs down the road.
Don't Wait for Spring—Service in the Fall
This is probably the single most important habit you can adopt. Too many boaters put off their lower unit service until springtime, but the seasoned guys know that's a huge mistake.
If any water seeped into your gearcase during the season (and it's more common than you think), letting it sit all winter is a recipe for disaster. That moisture will cause rust and pitting on your gears and bearings, leading to expensive damage you won't discover until you're ready to launch.
Draining the old oil in the fall gets rid of any contaminants and gives you a chance to spot problems early. Refilling with fresh gear lube from MacombMarineParts.com lets the internals sit in a protective bath of clean oil all winter long.
The 10-Second Fishing Line Check
Here's a free habit that can literally save you thousands of dollars: always check the propshaft for tangled fishing line. Before you even think about touching a drain plug, take a quick look behind the propeller.
- Why it's a big deal: Monofilament or braided line is the number one enemy of prop shaft seals.
- How it does the damage: The line wraps tightly around the shaft and works its way into the seal, slowly cutting and grooving the rubber. This creates a perfect path for water to get in and gear oil to get out.
This simple visual inspection is your best defense against finding that dreaded milky, water-contaminated oil during your next service.
Think of your old gear oil as a report card for your engine. Grab a small notebook and start a maintenance log. Jot down the date, engine hours, and what the oil and magnetic drain plug looked like. This history is invaluable for spotting a problem that's getting worse over time.
The Unbreakable 100-Hour Rule
Consistency is everything when it comes to reliability. It's no coincidence that every major outboard manufacturer—from Yamaha to Mercury to Suzuki—recommends changing your lower unit oil every 100 hours or once a year, whichever comes first.
Yet, a recent survey showed that a shocking 72% of boat owners admit to skipping this critical service. The result? Average repair costs hit $1,200 per incident—a whole lot more than a bottle of gear oil and a few minutes of your time. You can learn more about these industry standards and the real costs of neglect in this detailed DIY guide on JLM Marine.
Finally, be a good steward of our waterways. Never dump used gear oil on the ground or in the trash. Most auto parts stores, and even your local marina, will take used oil for recycling, usually for free.
Protecting your engine and protecting the environment go hand-in-hand. And the best way to protect that investment is by using top-quality parts from a trusted source like MacombMarineParts.com for everything from OEM-spec gear lube to the exact seal kits your engine needs.
A Few Common Questions We Hear All the Time
Even after you've buttoned everything up and wiped your hands, a few questions might still be nagging you. Getting them answered is the key to building confidence and making sure you did the job right to protect your investment. Let's run through some of the most common things boat owners ask.
The big one is always about using automotive gear oil in a pinch. The answer is a hard no. Marine-grade gear oil is formulated with special emulsifiers that are designed to handle water that might sneak in. Your car's gear oil doesn't have this magic ingredient. If water gets into an automotive-filled gearcase, it'll turn into a sludgy mess that offers zero protection, leading to rusty gears and catastrophic failure. Always stick with a marine-specific GL-5 rated lubricant from a trusted brand like Sierra or Quicksilver, which you can purchase at MacombMarineParts.com.
Best Practices and Common Worries
Another frequent concern is overfilling the lower unit. Good news—if you follow the proper procedure, it’s almost impossible to do. When you pump fresh oil into the bottom drain hole until it runs clean from the upper vent hole, the gearcase is perfectly full. This bottom-up method is critical because it pushes all the air out, ensuring the bearings at the very top of the driveshaft get the lubrication they need.
And what about those little drain plug gaskets? Do you really need to replace them every time? Yes, you absolutely do. This is non-negotiable. They are single-use crush washers designed to deform and create a perfect seal one time. Reusing them is the number one cause of slow leaks, which is just an open invitation for water to get in.
Think of new gaskets as the cheapest insurance policy you can buy for your expensive gearcase. A few dollars now prevents a potential multi-thousand-dollar repair later.
Finally, how tight is too tight for the drain plugs? It's easy to overdo it and crack the housing or strip the threads—a very common and costly mistake. You're aiming for snug, not strained. A good rule of thumb is to tighten firmly by hand until you feel the new gasket compress and seat, then give it a final quarter-turn. If you're using a torque wrench, the spec is usually between 60-80 in-lbs, but always double-check your owner’s manual.
Getting these little details right is what separates a quick-and-dirty job from professional-level maintenance. A perfect seal is everything, and that starts with the right parts. You can find the perfect lower unit seal kit for your model to ensure you get a factory-tight fit every time.
For every part you need, from OEM-spec gear lube and pumps to the exact-fit gaskets for your engine model, trust MacombMarineParts.com to have you covered. Shop now and get everything you need for your next maintenance project.